I was halfway through a late‑night taco night, feeling guilty about the greasy mess on my stove, when the phone buzzed with a friend’s challenge: “Dude, make the best burrito ever and prove you’re the culinary king.” I laughed, but the craving that followed was too fierce to ignore. I pulled out a stack of flour tortillas, a can of ground beef, and a handful of spices that had been gathering dust in my pantry. The kitchen smelled of cumin and chili powder, a promise of boldness that could turn a humble dinner into an edible headline. I knew I was about to rewrite the burrito rulebook, and I couldn’t wait to share the secret sauce, quite literally, that would make every bite sing.
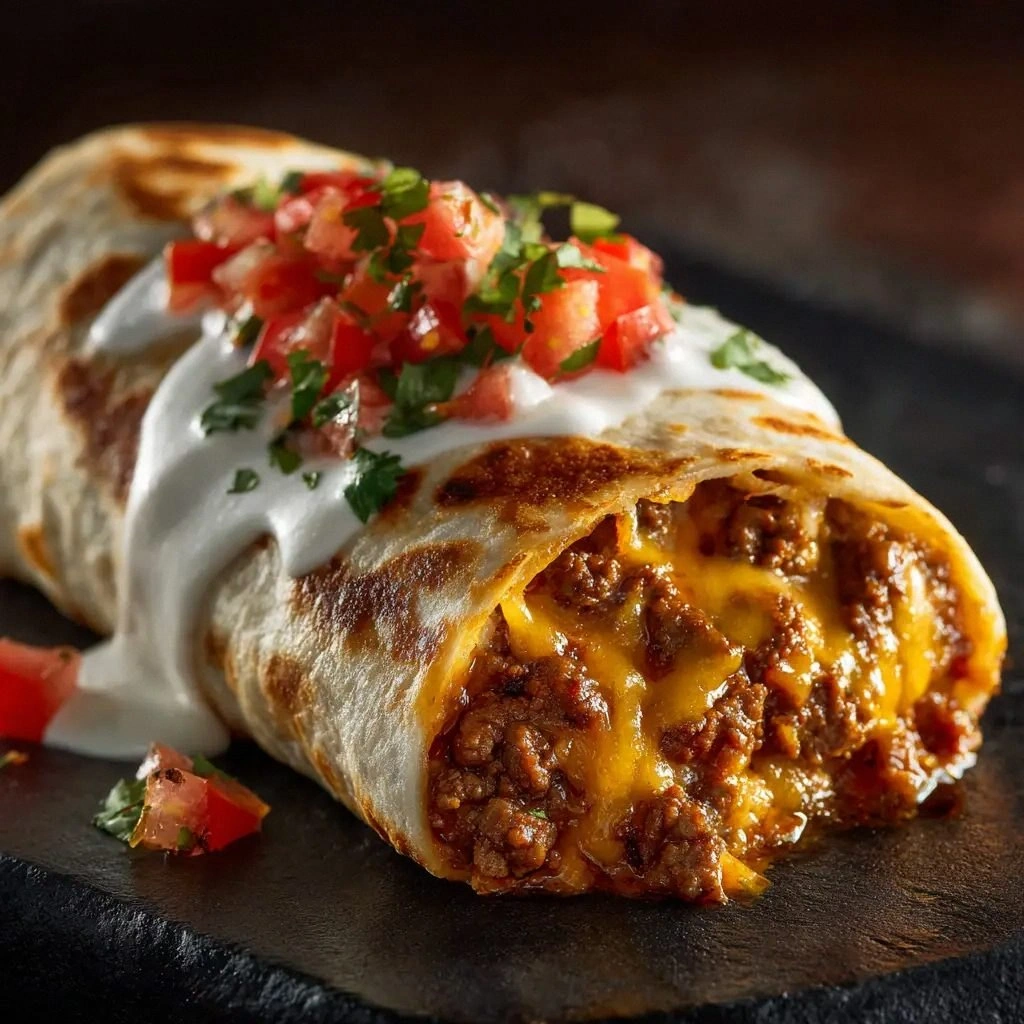
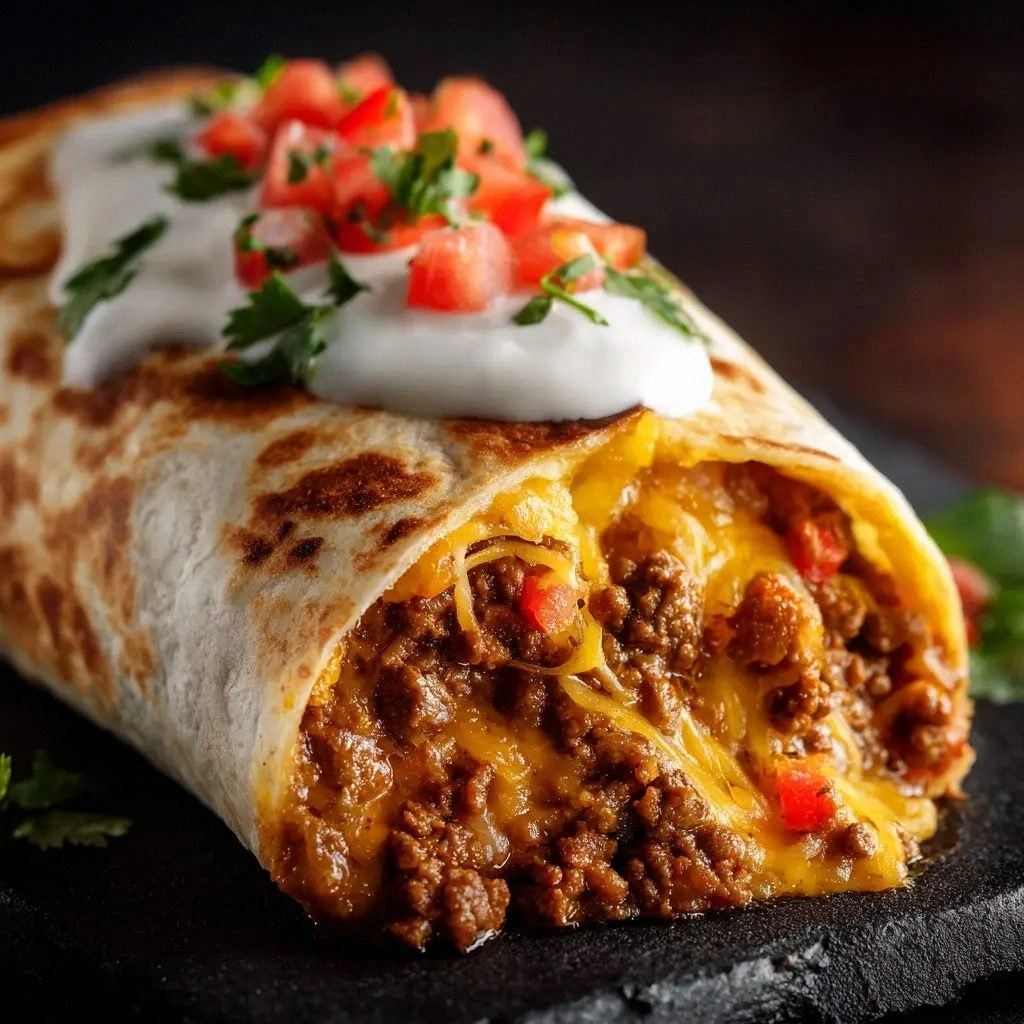
Picture this: a golden, slightly charred tortilla hugging a generous mound of seasoned ground beef, rice, melted cheese, and a swirl of nacho cheese sauce that glistens like a molten lava flow. The steam rises, carrying the aroma of toasted cumin and the subtle heat of cayenne, while the sound of the sizzling meat echoes like a drumbeat in the kitchen. I dare you to taste this and not go back for seconds—your taste buds will be shouting for more. The texture is a masterpiece: a crispy edge that shatters like thin ice, a soft interior that melts in your mouth, and a cheese layer that coats the filling like velvet. It’s a symphony of flavors and textures that will make you question every other burrito you’ve ever had.
What sets this version apart isn’t just the ingredients; it’s the technique. I’ve spent years experimenting with the perfect balance of spices, the right amount of moisture, and the ideal grilling method to get that buttery crisp without drying out the tortilla. The secret is in the layering: the beef sits on a bed of rice, topped with a generous pour of warm nacho cheese sauce, a generous handful of three‑cheese blend, and a final dollop of sour cream that adds a tangy counterpoint. Each component is chosen for its ability to complement the others, creating a burrito that feels both indulgent and comforting. It’s hands down the best version you’ll ever make at home, and I’m excited to walk you through every single step.
I’ll be honest—before I started this project, I’d never thought a burrito could be so complex. I’d always seen it as a simple roll of meat and cheese. But this recipe turns the humble burrito into a culinary adventure, a dish that feels like a gourmet experience on a budget. I’ve poured hours into perfecting the seasoning blend, testing different cheeses, and finding the sweet spot for the nacho sauce. The result? A burrito that’s thick, flavorful, and absolutely unforgettable. And the best part? You can make it in under an hour, and it’s perfect for a crowd or a quick weeknight dinner.
If you’ve ever struggled with making burritos that stay together or taste bland, you’re not alone—this is the fix you’ve been waiting for. The key is in the layers and the precise timing of each step. I’ve broken down every detail so you can replicate the exact same mouth‑watering experience. Stay with me here—this is worth it. Let me walk you through every single step—by the end, you’ll wonder how you ever made it any other way.
What Makes This Version Stand Out
- Flavor: A bold, well‑balanced spice mix that hits every note from savory to spicy without overwhelming the palate. The combination of chili powder, cumin, paprika, and cayenne creates depth and a subtle heat that lingers.
- Texture: A contrast between the crisp tortilla edges, the tender ground beef, and the gooey cheese layers. The rice provides a light bite that keeps the burrito from feeling heavy.
- Simplicity: Despite its gourmet feel, the recipe requires only a handful of pantry staples and a quick assembly process that even beginners can master.
- Uniqueness: The infusion of warm nacho cheese sauce into the filling transforms the classic burrito into a molten cheese experience that is rarely found in traditional recipes.
- Crowd Reaction: Friends who tried this version left with a single question: “What’s the secret?” The burrito’s richness and flavor profile make it a conversation starter.
- Ingredient Quality: Using lean ground beef ensures a juicy, flavorful meat base that doesn’t become greasy, while the fresh cheese blend delivers a melt that’s both creamy and slightly sharp.
- Cooking Method: Grilling the assembled burrito on a hot skillet gives it a caramelized crust that seals in moisture and adds a smoky note.
- Make‑Ahead Potential: The filling can be pre‑prepared and stored in the fridge, making it a perfect weeknight meal that feels like a gourmet dinner.
Alright, let's break down exactly what goes into this masterpiece…
Inside the Ingredient List
The Flavor Base
The ground beef is the heart of the dish, but it’s the spices that give it life. Chili powder, cumin, paprika, garlic powder, onion powder, and cayenne pepper combine to create a savory, smoky foundation. Each spice adds a layer of complexity—cumin brings earthiness, paprika adds a gentle sweetness, and cayenne gives a subtle bite that wakes up the taste buds. If you skip the spices, the beef becomes bland and the burrito loses its soul. For a milder version, reduce the cayenne to a pinch or omit it entirely.
When selecting ground beef, aim for a lean cut with 90/10 fat content. This balance ensures the meat stays juicy while preventing excess greasiness that can make the burrito soggy. If you prefer a richer flavor, you can swap in a higher fat percentage, but be prepared to drain the excess fat before adding the spices. A quick test—cook a small patty and taste the seasoning—will help you fine‑tune the balance for your palate.
The Texture Crew
Rice is the unsung hero that balances the richness of the beef and cheese. Long‑grain white rice offers a clean, fluffy texture that contrasts with the hearty beef and melt‑in‑your‑mouth cheese. If you’re a fan of a bit of chew, try substituting jasmine or basmati rice for a fragrant twist. The key is to cook the rice with just enough water so that it remains fluffy and doesn’t clump, ensuring each bite has a satisfying bite.
The nacho cheese sauce is the secret weapon that turns an ordinary burrito into a molten masterpiece. Warmed to a silky consistency, it coats the filling like a glossy glaze, adding a creamy, cheesy layer that melts into every nook and cranny. If you can’t find a store‑bought nacho sauce, blend a few tablespoons of cheddar, a splash of milk, and a pinch of paprika until smooth. This DIY version maintains the same flavor profile and can be flavored with a dash of hot sauce for an extra kick.
The Unexpected Star
Sour cream may seem like a simple topping, but it’s the perfect counterbalance to the rich cheese and spicy beef. Its tanginess cuts through the richness, adding a bright, refreshing note that lifts the entire dish. A small dollop on top of the assembled burrito creates a beautiful contrast in both flavor and color. If you’re watching calories, replace sour cream with Greek yogurt for a lighter option that still delivers that tangy punch.
The Final Flourish
The flour tortillas are the canvas that brings everything together. Large (10‑inch) tortillas provide ample space for the generous filling without tearing. Warm the tortillas briefly on a dry skillet or microwave to make them pliable and prevent cracking. If you’re using whole‑wheat tortillas, keep an eye on them—they can dry out quickly during grilling, so a quick brush of oil helps keep them supple.
Everything's prepped? Good. Let's get into the real action…
The Method — Step by Step
- Heat a large skillet over medium‑high heat and add the tablespoon of oil or butter. Once hot, add the ground beef, breaking it apart with a spatula. The beef should sizzle loudly—this is the sound of flavor locking in. Cook until the meat is fully browned, about 8 minutes, stirring occasionally. Drain any excess fat to keep the filling lean.
- Add the chili powder, cumin, paprika, garlic powder, onion powder, and cayenne pepper to the skillet. Stir quickly to coat the meat evenly; the spices should toast for about 30 seconds, releasing their aromas. Add the ½ cup of water to loosen the mixture and help the spices meld. Let the mixture simmer until the liquid reduces slightly, about 2 minutes.
- Season the beef with salt and pepper to taste. Taste the mixture, adjust the seasoning if needed, and remove from heat. The beef should feel robust and slightly moist—no dry patches. Set aside while you prepare the remaining components.
- Warm the nacho cheese sauce in a small saucepan over low heat until it reaches a silky, pourable consistency. Keep stirring to prevent scorching. The sauce should be thick enough to coat the back of a spoon but still fluid enough to drizzle. This step is crucial for that molten cheese effect.
- Lay a tortilla flat on a clean surface. Spread a generous layer of cooked rice over half of the tortilla, leaving a small border around the edge. The rice acts as a moisture barrier, preventing the tortilla from becoming soggy.
- Pour the warm nacho cheese sauce over the rice, allowing it to seep into the grains. The sauce should coat the rice like a glossy glaze. This creates a creamy base that complements the beef and cheese layers.
- Add a hearty scoop of the seasoned ground beef on top of the cheese‑coated rice. Pack the beef firmly but gently to keep the layers together. The beef should be hot, ensuring that the heat transfers through the filling.
- Sprinkle a generous handful of the three‑cheese blend over the beef. The mix of cheddar, Monterey Jack, and mozzarella should melt into a glossy, bubbly layer. If you’re a cheese lover, feel free to add a bit more for extra gooeyness.
- Fold the sides of the tortilla toward the center, then roll tightly from the bottom up, ensuring the filling stays sealed. The goal is a neat, cylindrical shape that holds everything together during grilling.
- Heat a clean skillet over medium heat and lightly brush it with oil. Place the rolled burrito seam side down and press gently with a spatula. Grill until the tortilla is golden and crisp, about 3–4 minutes per side. The tortilla should emit a nutty aroma and have a satisfying crunch when you bite into it.
- Remove the burrito from the skillet and let it rest for a minute. Slice in half and drizzle a dollop of sour cream over the top. The sour cream should swirl into the warm filling, creating a creamy contrast that balances the richness.
That's it — you did it. But hold on, I've got a few more tricks that'll take this to another level…
Insider Tricks for Flawless Results
The Temperature Rule Nobody Follows
Many people cook burritos on high heat, causing the tortilla to burn before the filling warms through. The trick is to use medium heat, allowing the tortilla to crisp slowly while the filling stays moist. If you’re using a grill pan, preheat it for a few minutes and then reduce to medium. This ensures an even golden crust and a perfectly heated interior.
Why Your Nose Knows Best
The aroma of cumin and chili powder is a powerful indicator of flavor development. If the spices haven’t toasted enough, the beef will taste flat. Keep an eye on the color of the spices—they should darken slightly and emit a nutty scent. This sensory cue guarantees that every bite is packed with depth.
The 5‑Minute Rest That Changes Everything
After grilling, let the burrito rest for 5 minutes before cutting. This allows the cheese to set slightly, preventing it from leaking out and creating a mess. The rest period also lets the flavors meld, resulting in a more cohesive taste profile. Trust me, this small pause makes a huge difference.
The Cheesy Layer Trick
If you’re a cheese lover, sprinkle a thin layer of shredded cheddar over the top of the burrito before grilling. The cheese will melt into a golden crust that adds a crunchy, cheesy bite. This simple addition elevates the burrito from good to unforgettable.
The Sauce Swirl Secret
When adding the nacho cheese sauce, swirl it into the rice with a spoon. This creates a marbled effect that adds visual appeal and ensures every bite is coated with gooey cheese. The swirl also helps the sauce to distribute evenly, preventing pockets of dry beef.
Creative Twists and Variations
This recipe is a playground. Here are some of my favorite ways to switch things up:
Spicy Southwest Smash
Swap the ground beef for grilled chicken strips and add diced jalapeños to the filling. Replace the nacho cheese sauce with a smoky chipotle‑infused cheese. This version offers a fresh, zesty flavor that’s perfect for summer gatherings.
Mediterranean Melt
Use a mix of feta and goat cheese instead of the three‑cheese blend. Add chopped Kalamata olives and sun‑dried tomatoes to the rice. The result is a tangy, savory burrito that feels like a Mediterranean wrap.
Vegan Power Burrito
Replace the ground beef with crumbled tempeh seasoned with the same spice blend. Use a plant‑based nacho cheese sauce and vegan cheese. The texture remains hearty, and the flavor profile stays bold.
Breakfast Burrito Boost
Add scrambled eggs to the filling and sprinkle shredded cheddar on top. Use a small amount of salsa for a bright kick. This variation turns the dish into a satisfying breakfast or brunch option.
Mango‑Habanero Twist
Fold diced mango into the rice and add a splash of habanero sauce to the nacho cheese sauce. The sweet‑spicy combo offers a tropical flavor that’s both unexpected and delightful.
Cheesy Taco Crunch
Top the assembled burrito with a handful of crushed tortilla chips before grilling. The chips soften and add a crunchy texture that contrasts with the soft interior. This version is perfect for those who love a bit of crunch.
Storing and Bringing It Back to Life
Fridge Storage
Wrap each burrito tightly in foil or parchment paper and store in the refrigerator for up to 3 days. The foil keeps the tortilla from drying out, while the parchment prevents sticking. When ready to eat, reheat in a skillet or microwave until steaming.
Freezer Friendly
For longer storage, place the wrapped burritos in a freezer bag and label with the date. They can be frozen for up to 2 weeks. Thaw overnight in the fridge before reheating to maintain moisture.
Best Reheating Method
Reheat the burrito in a preheated skillet over medium heat, pressing gently with a spatula. Add a tiny splash of water to the pan before covering to create steam that keeps the filling moist. Finish with a quick grill to revive the crisp tortilla.