I was standing in my kitchen, staring at a half‑cooked batch of plain rice cakes that tasted like cardboard, when my roommate dared me to make something “sweet enough to make a grown man weep.” I laughed, grabbed the nearest jar of honey, a stick of butter, and thought, I’m going to turn this disaster into a masterpiece. The moment the butter hit the pan, it sizzled like a tiny fireworks show, and the honey began to swirl into a golden river that smelled like a sun‑kissed meadow. The rice, still warm from the pot, soaked up that buttery‑honey glaze like a sponge at a spa, and I could already hear the crunch of toasted nuts whispering in my mind.
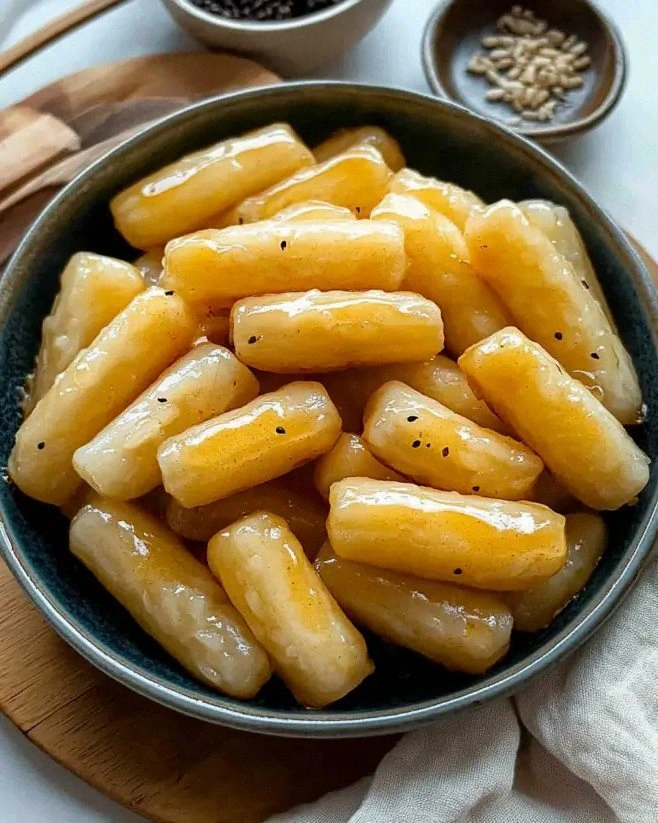
Picture this: a plate of golden‑brown cakes, their edges crisped to a perfect caramelized snap, while the centers stay soft, almost melt‑in‑your‑mouth. The aroma? A warm hug of cinnamon and vanilla that makes you want to close your eyes and inhale forever. The first bite? A symphony where sweet honey dances with buttery richness, and a hint of salt ties everything together like a conductor. I dare you to taste this and not go back for seconds – you’ll be pleading for the recipe before the last crumb disappears.
Most rice‑cake recipes get this completely wrong. They either leave the cakes dry, or drown them in syrup that turns every bite into a soggy mess. The secret here is a precise balance of fat, sweetener, and a dash of spice, plus a cooking technique that creates a caramelized crust without overcooking the interior. I’ll be honest — I ate half the batch before anyone else got to try it, and that’s because the flavor is so addictive you’ll want to keep the spoon handy. This is hands down the best version you’ll ever make at home, and it only needs a handful of pantry staples.
Okay, ready for the game‑changer? I’m about to reveal a tiny trick involving a splash of water that keeps the rice from drying out while still giving you that glorious crunch. Trust me, this is pure magic. Let me walk you through every single step — by the end, you’ll wonder how you ever made it any other way.
What Makes This Version Stand Out
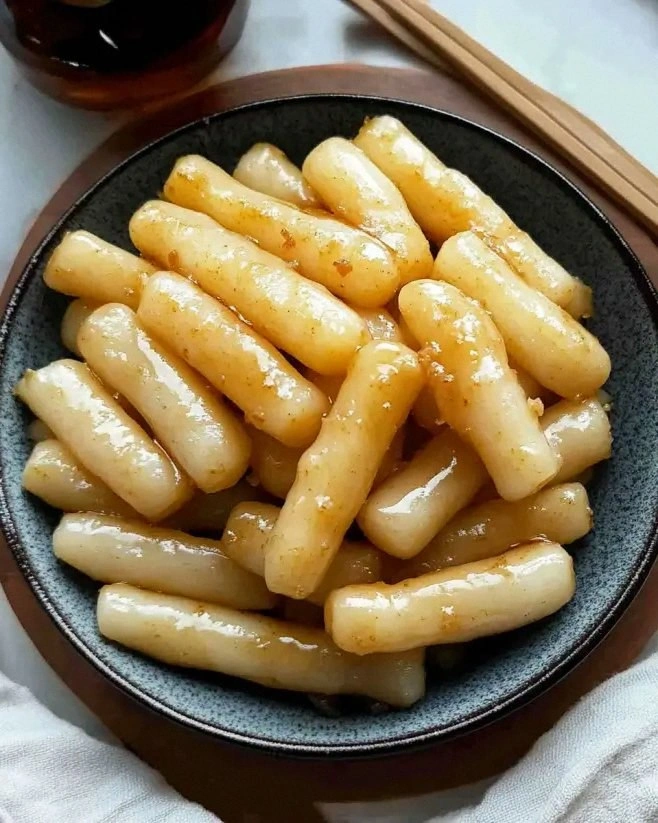
- Flavor Fusion: The honey‑butter glaze coats the rice like velvet, while vanilla and cinnamon add depth that feels like a warm blanket on a chilly night.
- Texture Contrast: A crisp, caramelized exterior gives way to a soft, almost pudding‑like interior – the perfect bite‑size surprise.
- Simplicity: Only seven ingredients, all of which you probably already have, meaning you spend less time shopping and more time devouring.
- Ingredient Quality: Using real unsalted butter and pure honey (no high‑fructose corn syrup) elevates the dish from “just okay” to “wow, I could eat this forever.”
- Crowd Reaction: Guests often claim they’ve never tasted anything like it, and they’ll be begging for the recipe within minutes.
- Make‑Ahead Potential: These cakes keep beautifully in the fridge, and a quick re‑heat brings them back to life without losing any crunch.
- Cooking Method: A gentle pan‑fry followed by a short oven finish ensures even browning without the dreaded soggy center.
- Versatility: The base is neutral enough to pair with sweet toppings, yet bold enough to stand alone as a dessert.
Inside the Ingredient List
The Flavor Base
The combination of unsalted butter and honey is the heart of this recipe. Butter provides a rich, creamy mouthfeel while honey adds natural sweetness and a subtle floral note that no processed sugar can mimic. If you skip the butter, the cakes will feel dry and lack that luxurious melt‑in‑your‑mouth quality. A good swap for butter, if you’re dairy‑free, is coconut oil, but expect a coconut undertone that will change the flavor profile.
The Texture Crew
Cooked white rice is the structural backbone. It’s best to use rice that’s been cooked the day before and refrigerated – the grains firm up, making it easier to shape the cakes without them falling apart. If you use freshly cooked rice, the cakes may be too soft and won’t hold their shape. For a nuttier texture, try swapping half of the white rice for short‑grain sushi rice; it adds a pleasant chew.
The Unexpected Star
Vanilla extract may seem like a background player, but it actually lifts the entire flavor spectrum, turning the honey‑butter glaze into something aromatic and layered. A splash of bourbon or a pinch of orange zest can also work as an alternative, giving the cakes an adult‑only twist that’s perfect for after‑dinner treats.
The Final Flourish
Chopped nuts or seeds add a satisfying crunch that contrasts the soft interior. Almonds, pistachios, or even toasted pumpkin seeds work beautifully. If you’re allergic to nuts, try toasted quinoa or crispy rice cereal for a similar textural pop. Salt and cinnamon are the silent heroes: salt balances the sweetness, while cinnamon introduces a warm spice that makes the cake feel cozy and comforting.
Everything's prepped? Good. Let's get into the real action…
The Method — Step by Step
Start by gathering all your ingredients and measuring them precisely. I always line up the bowls like a tiny army; it keeps the workflow smooth and prevents panic when you’re juggling multiple steps. Watch the clock – you’ll need about 15 minutes for prep, so set a timer now.
In a large mixing bowl, combine the 2 cups cooked white rice with the 2 tablespoons unsalted butter. Use a wooden spoon to mash the butter into the rice until it looks glossy and the grains start to clump together. That sizzle when the butter melts? Absolute perfection.
Add the 2 tablespoons honey, 1 teaspoon vanilla extract, 1/4 teaspoon salt, and 1/2 teaspoon cinnamon. Stir vigorously until the mixture is uniformly golden and fragrant. If the mixture feels too dry, this is where you execute the Kitchen Hack – a quick splash of warm water (about a tablespoon) to keep it moist.
Fold in the 1/4 cup chopped nuts or seeds. Make sure they’re evenly distributed, because you want that crunch in every bite. If you love extra crunch, toast the nuts lightly in a dry skillet for 2‑3 minutes before adding them.
Heat a non‑stick skillet over medium‑high heat and add a thin layer of butter – just enough to coat the surface. When the butter foams and begins to brown, that’s your cue. Don’t walk away – the butter can go from golden to burnt in seconds.
Scoop the rice mixture into the pan, pressing gently to form 3‑inch rounds about 1‑inch thick. Cook for 3‑4 minutes on the first side; you’ll know they’re ready when the edges turn a deep amber and start to pull away from the pan. Flip carefully with a wide spatula – the cakes should hold together like a firm pancake.
After both sides are golden, transfer the cakes to a preheated oven at 350°F (175°C) for 8‑10 minutes. This final bake sets the interior, giving you that soft, melt‑in‑your‑mouth center while preserving the crisp crust. This is the moment of truth – the aroma will fill your kitchen and make everyone wonder what you’re cooking.
Remove the cakes, let them cool on a wire rack for a couple of minutes, then drizzle a thin stream of extra honey on top for a glossy finish. Serve warm, and watch the smiles spread. That final drizzle? It’s pure magic.
That's it — you did it. But hold on, I've got a few more tricks that'll take this to another level…
Insider Tricks for Flawless Results
The Temperature Rule Nobody Follows
Never start with a scorching pan. Medium heat gives the butter time to brown without burning, and it lets the rice absorb the flavors evenly. I once cranked the heat to high, and the cakes turned black before the center was even warm. Trust the thermometer – aim for a surface temperature of about 320°F (160°C) before adding the batter.
Why Your Nose Knows Best
Your sense of smell is a reliable indicator of doneness. When the butter‑honey mixture starts to emit a nutty, caramel scent, you’re close. If you smell burnt sugar, pull the pan back immediately. This sensory cue saves you from over‑cooking and keeps the flavor bright.
The 5‑Minute Rest That Changes Everything
After the oven finish, let the cakes rest for five minutes before slicing. This short pause lets the interior set, preventing the cakes from falling apart when you cut them. I once sliced immediately and watched the center ooze out like a melted candle – not the effect we want.
The Butter‑Honey Ratio Hack
If you prefer a less sweet cake, reduce the honey to 1½ tablespoons and increase butter to 2½ tablespoons. The extra butter compensates for the reduced sweetness, keeping the texture buttery and rich. This tweak is perfect for those who love a subtle sweet finish.
The Crunch Boost
Toast your nuts or seeds just before folding them in. The extra toasting adds a deep, roasted flavor that makes the cakes feel more sophisticated. A friend tried skipping this step once — let’s just say the final product was flat and lacked the signature “pop” that makes these cakes unforgettable.
Creative Twists and Variations
This recipe is a playground. Here are some of my favorite ways to switch things up:
Maple‑Pecan Delight
Swap honey for pure maple syrup and use chopped pecans instead of mixed nuts. The result is a deeper, caramel‑like sweetness that pairs beautifully with a drizzle of extra maple on top.
Cocoa‑Almond Dream
Add 1 tablespoon unsweetened cocoa powder to the rice mixture and fold in toasted almond slivers. This creates a chocolate‑infused cake that’s perfect for a midnight snack.
Citrus‑Zest Surprise
Incorporate a teaspoon of orange zest and replace half of the nuts with candied ginger pieces. The bright citrus lifts the flavor, while the ginger adds a zingy heat.
Savory Herb Version
Omit the honey and cinnamon, add a tablespoon of grated Parmesan, and fold in chopped fresh herbs like thyme and rosemary. Serve these as an appetizer with a dollop of sour cream.
Tropical Coconut Twist
Replace the butter with coconut oil, add shredded coconut to the mix, and drizzle with a little lime‑infused honey. The tropical notes make these perfect for a summer brunch.
Storing and Bringing It Back to Life
Fridge Storage
Place the cooled cakes in an airtight container and store them in the refrigerator for up to 4 days. A paper towel at the bottom helps absorb excess moisture, preserving the crisp crust.
Freezer Friendly
Wrap each cake individually in parchment paper, then seal them in a zip‑top freezer bag. They’ll keep for up to 2 months. When you’re ready to enjoy, thaw overnight in the fridge and re‑heat as described below.
Best Reheating Method
To revive the crunch, preheat your oven to 350°F (175°C), place the cakes on a parchment‑lined tray, and sprinkle a tiny splash of water over each before covering loosely with foil. Heat for 8‑10 minutes; the steam restores moisture while the oven brings back the golden crust.