Picture this: it’s 3 a.m., you’re half‑asleep, and the faint hum of the refrigerator is the only thing keeping you company. Suddenly, a craving hits you like a bolt of lightning—soft, chewy cookies that melt on your tongue, with caramel that drapes each bite like a buttery blanket, and a pinch of sea salt that snaps you awake. I was in that exact spot, half‑awake and half‑hungry, when a friend dared me to bake something that would make even the most seasoned baker weep with joy. I accepted the challenge, rummaged through the pantry, and after a few frantic experiments, I finally nailed the perfect formula. This isn’t just any cookie; it’s a revelation that turns a simple snack into a moment of pure bliss.
When the dough hits the counter, the aroma of melted butter and caramel swirls together, creating a scent that could coax a smile out of a stone statue. The kitchen fills with a warm, sweet perfume that whispers promises of caramel‑kissed perfection. As the cookies bake, the edges start to turn a light amber, the tops puff up like tiny clouds, and the air becomes thick with the promise of that first bite. When you finally pull them out, the whole house smells like a caramel boutique on a rainy day, and you can’t help but stare, mesmerized, at the glossy specks of caramel and chocolate glistening like tiny jewels.
What sets this version apart from every other recipe you’ve tried is a combination of three secret weapons: a precise balance of sugars, a buttery base that stays soft, and a strategic sprinkle of flaky sea salt that cuts through the sweetness like a cool breeze on a hot summer’s day. Most recipes get the texture wrong—either they’re cakey, or they’re too crisp. I’ve cracked the code by using a 3:1 ratio of brown to white sugar, chilling the dough for at least an hour, and folding in caramel chips at just the right moment. The result? A cookie that’s soft in the center, chewy at the edges, and has a caramel crunch that sings with every chew.
But wait—there’s a twist you won’t see coming. I’m about to introduce a technique that most bakers overlook: a brief, high‑heat blast at the end of baking that creates a caramelized crust without hardening the interior. Okay, ready for the game‑changer? Let me walk you through every single step — by the end, you’ll wonder how you ever made it any other way.
What Makes This Version Stand Out
- Flavor Explosion: The marriage of caramel chips and chocolate creates a layered taste that starts sweet, ends salty, and leaves a lingering buttery finish.
- Chewy Perfection: The ratio of brown to white sugar, plus the chilled dough, guarantees a chew that stretches like taffy without turning gummy.
- Simple Ingredients: No exotic flours or obscure spices—just pantry staples, which means you can whip this up any night of the week.
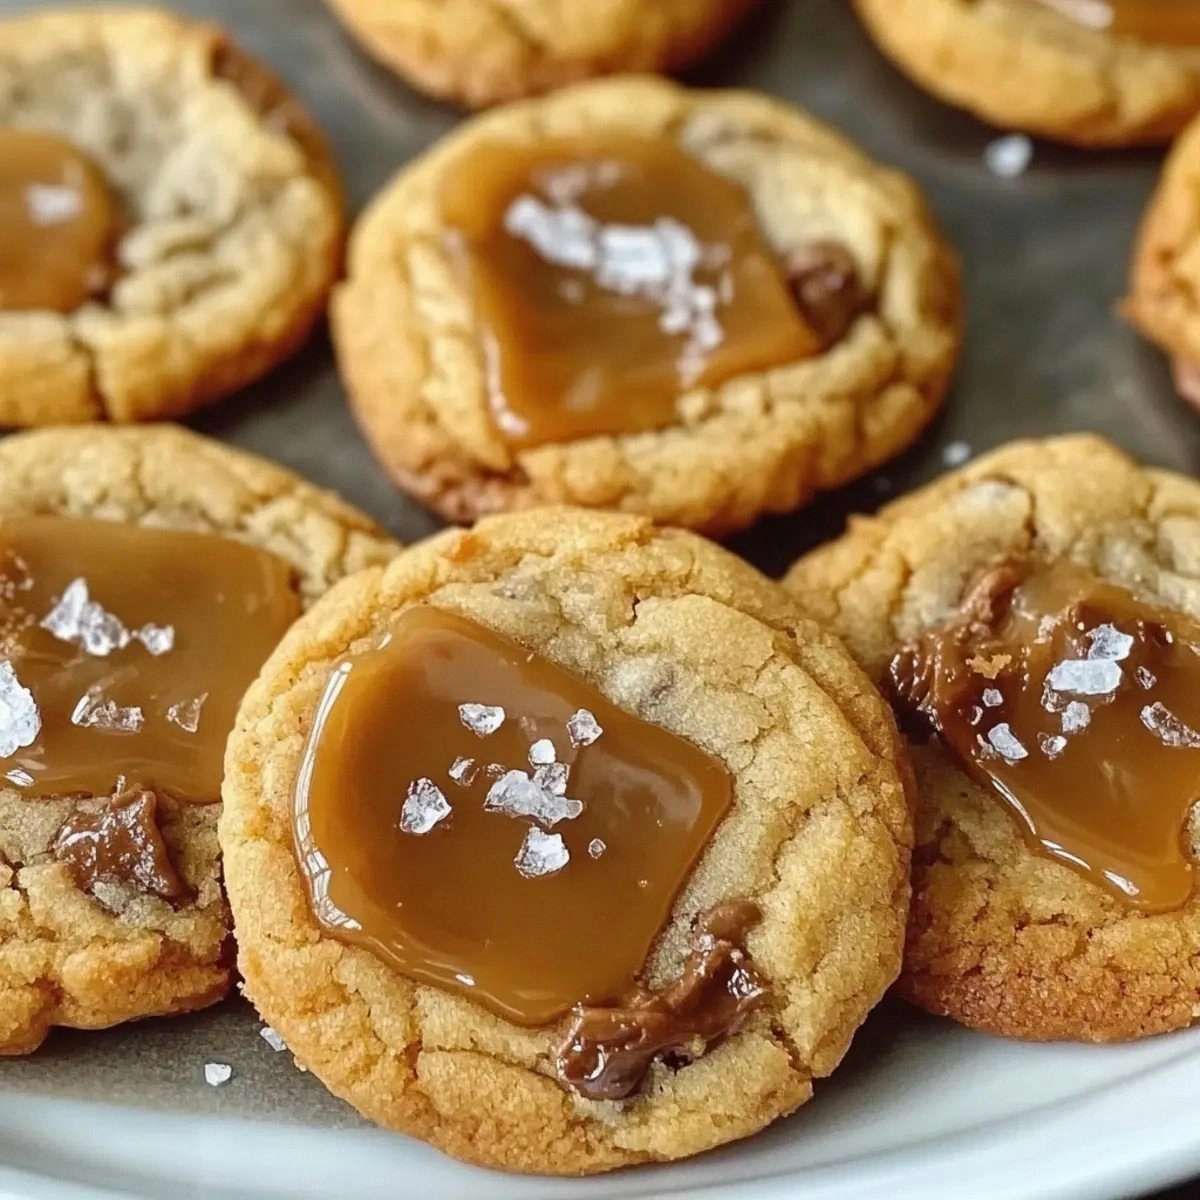
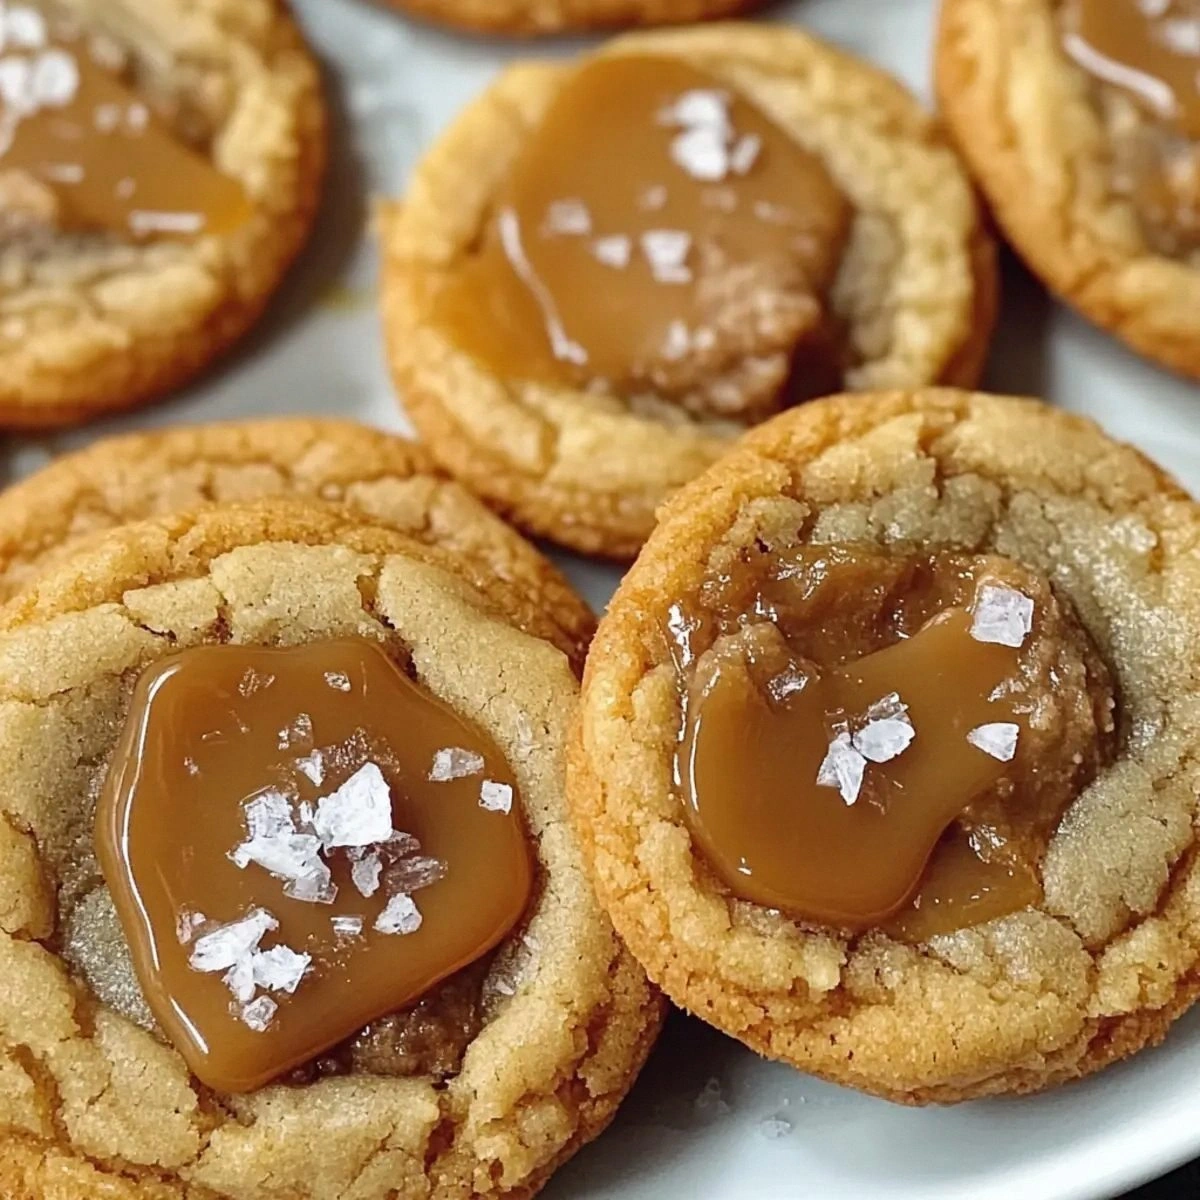
- Visual Appeal: Those caramel speckles melt just enough to create a glossy, Instagram‑ready surface that practically begs to be shared.
- Crowd‑Pleaser: I dare you to taste this and not go back for seconds; even the pickiest eaters beg for more.
- Quality Matters: Using real butter and premium caramel chips makes a world of difference—no shortcuts, just pure indulgence.
- Versatile Timing: The dough can be made ahead and frozen, giving you cookie bliss on demand—perfect for last‑minute gatherings.
Inside the Ingredient List
The Flavor Base
Unsalted Butter (1 cup): This is the heart of the cookie, providing richness and a tender crumb. Using real butter—never margarine—creates that melt‑in‑your‑mouth feel. If you substitute with a lower‑fat spread, expect a drier texture and a muted flavor. Pro tip: Let the butter soften at room temperature, not melt, to keep the dough airy.
Granulated Sugar (¾ cup): It adds crispness and helps the cookies spread just enough. Too much, and you’ll end up with a hard edge; too little, and the chew disappears. For a deeper caramel note, you can swap half with demerara sugar, but keep the total volume the same.
Brown Sugar (¾ cup): The molasses in brown sugar is the secret behind that chewy interior. It also contributes a subtle earthy sweetness that balances the caramel chips. If you’re watching sugar, you can reduce each sugar by ¼ cup, but the texture will be less chewy.
The Texture Crew
All‑Purpose Flour (2 cups): This provides structure. Using cake flour would make the cookies too delicate, while bread flour would make them tough. For a gluten‑free version, swap with a 1‑to‑1 gluten‑free blend, but add a tablespoon of xanthan gum to retain chew.
Baking Soda (1 tsp): It creates lift and helps the cookies spread just enough for that perfect edge‑to‑center contrast. Too much and they’ll puff like muffins; too little and they’ll stay flat and dense. Always sift it with the flour to ensure even distribution.
Salt (1 tsp) & Flaky Sea Salt (1 tsp): The regular salt enhances overall flavor, while the flaky sea salt on top provides that pop of briny crunch. If you skip the flaky salt, the cookies will taste sweet but lack the sophisticated finish that makes them unforgettable.
The Unexpected Star
Caramel Chips (1 cup): These are the show‑stoppers. They melt slightly, creating pockets of gooey caramel that burst with each bite. If you can’t find caramel chips, chop up a good-quality caramel candy bar into chunks. The key is to avoid liquid caramel that can make the dough too wet.
Chocolate Chips (½ cup): Dark chocolate adds a bitter counterpoint that prevents the cookies from becoming cloyingly sweet. Milk chocolate works too, but you’ll lose some of that sophisticated edge. For a nutty twist, sprinkle in toasted pecans or walnuts.
The Final Flourish
Vanilla Extract (1 tbsp): Pure vanilla amplifies the caramel’s depth and rounds out the flavor profile. I always reach for the real‑extract bottle; imitation can taste flat. If you love a more complex aroma, add a pinch of espresso powder.
Everything's prepped? Good. Let's get into the real action...
The Method — Step by Step
Start by preheating your oven to 350°F (175°C). While the oven warms up, line two baking sheets with parchment paper; this prevents sticking and gives you that perfect golden edge. I like to set the sheets on opposite racks so they bake evenly.
In a large mixing bowl, whisk together the flour, baking soda, and the teaspoon of salt. This dry blend ensures the soda is evenly distributed, preventing any bitter pockets. Power transition: Now, let’s get the butter ready.
In a separate bowl, beat the softened unsalted butter with an electric mixer on medium speed until it’s pale and fluffy—about 2 minutes. The color change is your cue; it should look like sunshine in a bowl. Add the granulated and brown sugars, then continue beating until the mixture is light and airy, resembling a cloud.
Drop in the eggs one at a time, beating well after each addition. This prevents the mixture from curdling and creates a smooth emulsion. Finally, stir in the vanilla extract, letting its fragrant aroma fill the kitchen.
Kitchen Hack: Scrape the sides of the bowl with a rubber spatula after each addition to ensure every ingredient is fully incorporated.Gradually add the dry ingredients to the wet mixture, mixing on low speed. Stop as soon as you see a cohesive dough; over‑mixing will develop gluten and make the cookies tough. The dough should look slightly glossy and soft.
Now for the magic: fold in the caramel chips and chocolate chips with a gentle hand. Watch Out: If the caramel chips are too warm, they can melt into the dough, making it greasy. Keep them chilled until just before folding.
Watch Out: Over‑folding will break the caramel pieces, turning them into a sticky mess. Use a gentle, sweeping motion.Cover the bowl with plastic wrap and refrigerate the dough for at least 60 minutes. This step is the secret to that thick, chewy center because the chilled butter melts slower in the oven, giving you a soft middle and a slightly crisp edge.
When the dough is chilled, scoop out rounded tablespoons (or use a cookie scoop) onto the prepared sheets, spacing them about 2 inches apart. Lightly press each ball with the back of a spoon, then sprinkle a pinch of flaky sea salt on top—just enough to see the crystals glisten.
Slide the sheets into the preheated oven. Bake for 10‑12 minutes, then turn the oven up to 400°F (205°C) for an extra 2 minutes. This high‑heat blast caramelizes the edges without drying out the center—a trick that makes the cookies look glossy and taste like they’ve been brushed with butter.
Remove the cookies and let them cool on the sheet for 3 minutes before transferring to a wire rack. The cookies will continue to set as they cool, achieving that perfect balance of soft and chewy. And now the fun part: taste one while they’re still warm. That first bite? Pure bliss.
Insider Tricks for Flawless Results
The Temperature Rule Nobody Follows
Never bake cookies straight from the fridge at a low temperature. The secret is a short, high‑heat finish (as we did at 400°F). This creates a caramelized crust while the interior stays soft. I once tried baking at 350°F the whole time—my cookies turned out flat and lacked that signature snap.
Why Your Nose Knows Best
When the cookies are about 8 minutes in, start sniffing. If you catch a toasty, buttery scent with a hint of caramel, you’re on the right track. The aroma is a reliable indicator that the edges are just beginning to brown. Trust your nose more than the clock; ovens can vary by several degrees.
The 5‑Minute Rest That Changes Everything
After baking, let the cookies rest on the baking sheet for exactly 5 minutes before moving them. This short pause allows the residual heat to finish the cooking process without over‑drying. Skipping this step results in a cookie that cracks on the surface and loses that melt‑in‑your‑mouth feel.
Salted Finish, Not Over‑Salted
Only a pinch of flaky sea salt is needed. Sprinkle it while the cookies are still warm; the salt will melt slightly, adhering to the caramel chips. Too much salt, and you’ll mask the sweet caramel—just enough to make the flavors pop.
Batch Size Matters
If you bake more than 12 cookies at once, the oven temperature can drop, leading to uneven baking. I recommend baking in two batches for consistent results. This also gives you a chance to rotate the trays halfway through for even browning.
Creative Twists and Variations
This recipe is a playground. Here are some of my favorite ways to switch things up:
Nutty Caramel Crunch
Swap half of the caramel chips for toasted pecans or walnuts. The nuts add a buttery crunch that pairs beautifully with the caramel, and the extra oil from the nuts keeps the cookie moist.
Espresso‑Infused Delight
Replace the vanilla extract with 1 tsp of espresso powder dissolved in 1 tbsp of hot water. The coffee notes deepen the chocolate flavor and give the cookie a sophisticated edge—perfect for an after‑dinner treat.
White Chocolate & Sea Salt
Use white chocolate chips instead of dark chocolate, and increase the flaky sea salt to 1½ tsp. The contrast between the sweet, milky chips and the briny salt creates a flavor profile reminiscent of a gourmet caramel sea‑salt bar.
Spiced Autumn Edition
Add ½ tsp ground cinnamon and a pinch of nutmeg to the dry ingredients. The warm spices turn the cookie into a cozy fall favorite, especially when paired with a hot cup of cider.
Gluten‑Free Goodness
Swap the all‑purpose flour for a 1‑to‑1 gluten‑free blend and add 1 tsp xanthan gum. The texture remains chewy, and the caramel chips still melt into glorious pockets.
Vegan Version
Replace butter with coconut oil, use flax‑egg replacer (1 tbsp ground flaxseed + 3 tbsp water per egg), and ensure the caramel chips are dairy‑free. The result is a slightly coconut‑tinged cookie that still delivers that caramel‑chocolate bliss.
Storing and Bringing It Back to Life
Fridge Storage
Place cookies in an airtight container with a slice of bread on top. The bread releases moisture, keeping the cookies soft for up to a week. If you notice them drying out, replace the bread slice.
Freezer Friendly
Lay cookies on a parchment‑lined tray and freeze them individually for 2‑hour intervals, then transfer to a zip‑top bag. They’ll stay fresh for up to three months. When you’re ready, let them thaw at room temperature for 15 minutes.
Best Reheating Method
Preheat a skillet over low heat, add a tiny splash of water (just a few drops), and place a cookie in the pan. Cover for 30 seconds; the steam revives the chewiness, and the caramel chips melt back into glossy pockets.