I still remember the first time I made Texas Tornado Cake. It was one of those sweltering August afternoons where the air feels like soup and the cicadas are screaming just to be heard over the heat. My kitchen was a disaster zone—flour on the ceiling fan, eggshells in the sink, and a suspicious puddle of buttermilk slowly eating through the laminate. I was supposed to be bringing dessert to my neighbor's barbecue in three hours, and all I had was this handwritten recipe card from my great-aunt Ruth that looked like it had survived a actual tornado. The ink was smudged, the measurements were questionable, and there was a coffee ring right over the baking temperature. But something about the name—Texas Tornado—made me think, well, if I'm going down, I'm going down swinging.
Fast forward through a lot of cursing, one minor sugar burn, and a moment where I definitely considered just buying a sheet cake and claiming homemade status. Then the magic happened. That cake came out of the oven looking like a golden, craggy moonscape, and when I poured the hot buttermilk glaze over the top, it sank into every crevice like liquid sunshine. The smell alone should be illegal—buttery, caramelly, with this haunting whisper of cinnamon that makes you close your eyes involuntarily. I sliced into it while it was still warm because patience is not my virtue, and the first bite was like getting hugged by someone who really knows how to hug. Not one of those awkward side hugs—I'm talking full contact, rib-crushing, I-got-you type of embrace.
Here's what nobody tells you about Texas Tornado Cake: it's basically a scientific experiment in delicious chaos. The baking soda reacts with the buttermilk to create these incredible air pockets, so when you pour that glaze over, it creates these beautiful, almost geological layers of flavor. The edges get this chewy, almost candy-like quality while the inside stays impossibly moist. And the glaze—oh, the glaze—is where the real sorcery happens. It seeps down and creates this sticky, glossy top that shatters slightly when you cut it, giving way to the most tender crumb you've ever met.
I've made this cake probably forty-seven times since that first attempt, and it never fails to steal the show. Potlucks, funerals, baptisms, that one time my divorce lawyer demanded payment in baked goods—this cake has seen me through it all. The best part? It's embarrassingly easy. Like, "I could make this in my sleep while having an existential crisis" easy. But here's the kicker—most recipes get it completely wrong. They overthink it, add too many steps, try to make it fancy. Texas Tornado Cake isn't fancy. It's honest, it's messy, and it's got more personality than a room full of drunk cowboys. Let me walk you through every single step—by the end, you'll wonder how you ever made it any other way.
What Makes This Version Stand Out
Flavor Bomb: The combination of warm cinnamon and that tangy buttermilk creates this incredible depth that tastes like your grandmother's kitchen had a baby with a professional bakery. It's familiar but surprising, like hearing your favorite song in a completely different genre.
Texture Heaven: We're talking about a cake that manages to be both pillowy soft and addictively chewy at the same time. The edges caramelize into this candy-like crispness while the interior stays so moist it's almost pudding-like in the best possible way.
Foolproof Simplicity: No fancy equipment, no separating eggs, no "fold gently until just combined" nonsense. This is a dump-and-stir situation that somehow produces bakery-quality results every single time. I dare you to mess it up—I really do.
Feed-a-Crowd Size: This isn't some dainty little tea cake. This is a big, bold, unapologetically Texas-sized dessert that can feed twelve hungry adults or one person with a broken heart and a spoon. It actually tastes better the next day, so leftovers are a feature, not a bug.
Pantry Staple Magic: Everything you need is probably sitting in your kitchen right now. No specialty flours, no obscure extracts, no ingredients you have to special order from some fancy website. Just good, honest baking basics working together in perfect harmony.
The Glaze Game-Changer: While the cake is still warm, you pour over this buttermilk glaze that seeps into every nook and cranny, creating these incredible pockets of sweetness. It's like the cake is drinking up happiness, and you get to witness the whole beautiful process.
Make-Ahead Champion: This cake laughs in the face of timing stress. Make it tonight for tomorrow's party. Make it Sunday for Wednesday's book club. It just keeps getting better, like it's aging into its full potential like a fine wine or George Clooney.
Alright, let's break down exactly what goes into this masterpiece...
Inside the Ingredient List
The Flavor Foundation
All-purpose flour is the backbone here, but don't get cocky and try to substitute whole wheat or almond flour or whatever health kick you're on. The protein content in regular AP flour is exactly what we need to give this cake structure without making it tough. Cake flour is too delicate and will make your tornado collapse into a sad, mushy heap. Bread flour will turn it into a chewy disaster. Stick with the Goldilocks option—regular flour is just right.
Granulated sugar does more than just sweeten the deal here. It creates this incredible tender texture by interfering with gluten development, and it helps that beautiful golden-brown color develop on top. Don't even think about reducing the sugar—this isn't diet food, sweetheart. Embrace the sweetness or make a salad instead.
The Chemistry Crew
Baking soda is our leavening agent, and it's having a passionate chemical romance with the buttermilk. When these two meet, they create carbon dioxide bubbles that give the cake its characteristic light texture. But here's the thing—baking soda starts working the second it hits liquid, so don't let your batter sit around gossiping. Get it in the oven within about 10 minutes of mixing for maximum lift.
Ground cinnamon is what makes this taste like home, even if you've never been to Texas in your life. It's warm and comforting and just a little bit spicy, like that one cousin who always tells the best stories at family gatherings. Don't go overboard—this isn't snickerdoodle territory. We want hints of cinnamon, not a full-on spice assault.
The Unexpected Star
Vegetable oil is the secret to that incredibly moist texture that keeps people coming back for seconds (and thirds, let's be honest). Butter would make it richer but also denser and more prone to drying out. The oil keeps everything tender and extends the shelf life to almost unreasonable levels. I've eaten this cake five days after baking and it was still stupidly good.
Buttermilk is where the magic really happens. Its acidity tenderizes the gluten in the flour and reacts with the baking soda for lift, plus it adds this subtle tang that balances all that sweetness. No buttermilk? Make your own by adding a tablespoon of lemon juice or white vinegar to regular milk and let it sit for five minutes. It's not quite the same, but it'll get you close enough to still impress your mother-in-law.
The Final Flourish
Vanilla extract might seem basic, but it's essential for rounding out all those flavors and making everything taste more expensive than it is. Buy the good stuff if you can—real vanilla extract, not the imitation stuff that tastes like sadness and broken dreams. The difference is especially noticeable in simple recipes like this where every ingredient has to pull its weight.
Chopped pecans are technically optional, but leaving them out is like going to prom without a date—you can do it, but why would you want to? They add this incredible crunch and buttery flavor that takes the whole experience from great to legendary. Walnuts work too if that's what you have, but pecans are traditional for a reason.
Everything's prepped? Good. Let's get into the real action...
The Method — Step by Step
- Preheat your oven to 350°F (175°C) and grease a 9x13-inch baking pan like your life depends on it. I'm talking every corner, every edge, every little nook where cake might try to stage a rebellion. Use butter, use oil, use that spray stuff if you must—but do not skip this step unless you enjoy serving cake with a side of your best pan's coating. While you're at it, put the kettle on for coffee because in about 45 minutes, you're going to want something strong and hot to go with this masterpiece.
- In a large bowl, whisk together the flour, 2 cups sugar, baking soda, cinnamon, and salt until they're so well combined they look like they grew up together. This isn't just about mixing—it's about making sure every bite has that perfect balance of flavors. Take your time here, really get in there and break up any clumps of baking soda because nobody wants to bite into a pocket of soapiness. The mixture should smell faintly sweet and spicy, like a bakery had a baby with a spice market.
- Add the oil, eggs, and vanilla to the dry ingredients and mix until everything looks like wet sand at the beach—cohesive but not quite smooth yet. The batter will be thick and might seem like it's trying to form a union against you, but keep going. This is where the gluten starts developing, which gives the cake structure to hold all that glorious glaze. Don't overmix at this stage or your cake will have the texture of a rubber boot.
- Pour in the buttermilk and watch the transformation happen. Suddenly, everything loosens up and becomes this gorgeous, glossy batter that looks like it's been professionally developed by people who wear lab coats and get paid way too much money. Stir just until combined—no more, no less. Overmixing here is the difference between tender and tough, and we are definitely team tender. The batter should be pourable but not thin, like a really good smoothie consistency.
- If you're using nuts, fold them in now with the gentle touch of someone handling a newborn. You want them evenly distributed but not beaten to death. The nuts will toast as the cake bakes, releasing their oils and becoming these little pockets of crunchy paradise throughout the tender crumb. Save a handful for the top if you like things extra fancy, though fancy isn't really what we're going for here.
- Pour the batter into your prepared pan and smooth the top with a spatula. Don't worry about making it perfect—this cake has a rustic charm that doesn't need Instagram-level precision. Give the pan a gentle tap on the counter to release any air bubbles that might be hiding in there like shy party guests. Slide it into the oven and set your timer for 30-35 minutes, but start checking at 25 because ovens are like people—they all have their own personalities.
- While the cake bakes, make the glaze by combining the butter, 1 1/2 cups sugar, buttermilk, and baking soda in a saucepan. This is where things get interesting. The baking soda will react with the buttermilk and make the whole mixture foam up like a science fair volcano. Don't panic—this is exactly what we want. Cook over medium heat, stirring constantly, until it comes to a boil. Let it boil for one minute exactly (set a timer, seriously) then remove from heat and stir in the vanilla. It should be glossy and slightly thickened, like liquid caramel.
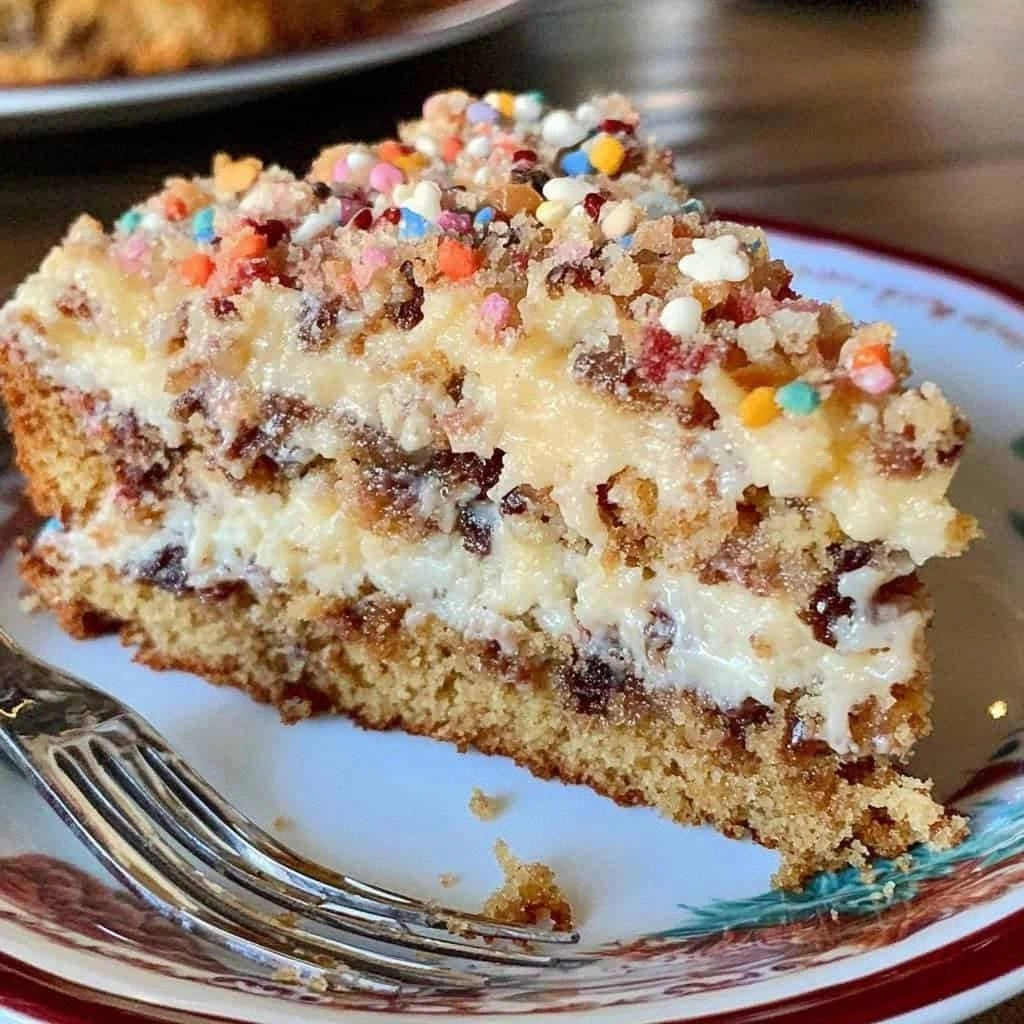
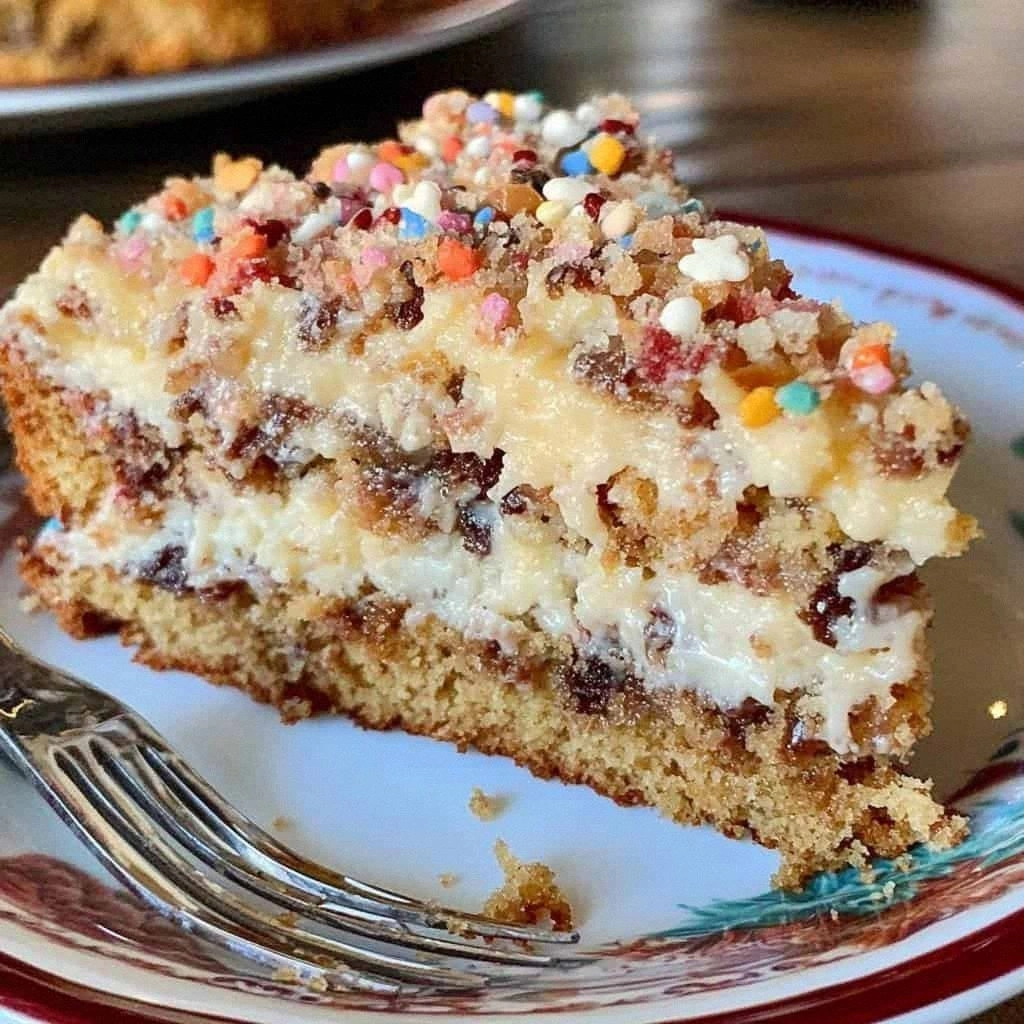
- When the cake is done—it should spring back when lightly touched and a toothpick inserted in the center should come out with just a few moist crumbs—remove it from the oven but leave it in the pan. This is crucial. Poke holes all over the top with a skewer or chopstick, going all the way to the bottom. This creates channels for the glaze to seep down into, creating those signature tornado swirls. Pour the hot glaze over the warm cake and watch it disappear like magic. Resist the urge to eat it immediately. I know, I know, but give it at least 15 minutes to soak in.
- Cut yourself a generous piece while it's still slightly warm, but not hot. The contrast between the tender cake and the sticky glaze is at its absolute peak right now. The edges will be slightly chewy, the center will be melt-in-your-mouth soft, and the nuts (if you used them) will have this perfect texture that's neither soft nor hard but somewhere in the Goldilocks zone of crunch. Serve it with coffee, serve it with milk, serve it with a fork straight from the pan at 2 AM while watching old sitcoms—there's no wrong way to eat this cake.
That's it—you did it. But hold on, I've got a few more tricks that'll take this to another level...
Insider Tricks for Flawless Results
The Temperature Rule Nobody Follows
Room temperature ingredients aren't just a suggestion—they're the difference between a cake that rises like a champion and one that sits there like a sad, dense brick. Take your eggs out of the fridge at least 30 minutes before baking, and if you're making buttermilk from scratch, let the milk come to room temp too. Cold eggs can cause the oil to seize up, creating little pockets of oil that never quite incorporate properly. Your cake will still taste good, but it won't have that perfect, even crumb that makes people think you've been secretly taking pastry classes.
Why Your Nose Knows Best
Don't just rely on the timer—your nose is actually one of the best tools for knowing when this cake is done. When it's perfectly baked, your kitchen will smell like butter, sugar, and cinnamon had a beautiful baby together. The scent changes from raw and floury to rich and caramel-like right when it's ready. If you start smelling nutty, toasty aromas, get that cake out immediately—those are the precursors to burning. I've saved more cakes by trusting my nose than by following timers religiously.
The 5-Minute Rest That Changes Everything
After you pour on the glaze, walk away for exactly five minutes. Set a timer. This is when the magic happens—the glaze seeps down and creates those beautiful, marble-like swirls throughout the cake. If you cut into it too soon, the glaze hasn't set up properly and you'll have a sticky mess. Wait too long and the glaze hardens too much, losing that beautiful glossy finish. Five minutes is the sweet spot where it's still warm and gooey but not running all over the place.
The Storage Secret That Seems Wrong
Here's the thing that doesn't make sense but absolutely works: store this cake covered at room temperature, not in the fridge. The refrigerator will dry it out faster than you can say "leftovers." Just cover it with foil or plastic wrap and leave it on the counter. It'll stay moist for up to four days, though in my house it's never lasted more than two. If you live somewhere really humid, you might want to store it in a cake carrier to keep the bugs away, but otherwise, room temp is your friend.
The Reheating Revelation
If you want to recapture that just-baked magic, microwave individual pieces for exactly 8-10 seconds. Not 15, not 20—8 to 10 seconds is the magic window where the glaze softens and the cake warms through without getting rubbery. Any longer and you're eating hot cake mush, which is a tragedy. Serve it with a scoop of vanilla ice cream that's been sitting out for 5 minutes so it's just starting to melt around the edges. The contrast between the warm, sticky cake and the cold, creamy ice cream will make you believe in love again.
Creative Twists and Variations
This recipe is a playground. Here are some of my favorite ways to switch things up:
The Drunken Cowboy
Add 2 tablespoons of bourbon to the glaze along with the vanilla. The alcohol cooks off, leaving behind this incredible depth that makes people ask if you've been holding out on your baking skills. Use a good quality bourbon—not the cheap stuff you used to drink in college. Something about the vanilla and caramel notes in bourbon plays beautifully with the cinnamon in the cake. Top with toasted pecans that have been tossed in a little melted butter and brown sugar for extra decadence.
The Tropical Storm
Replace half the oil with coconut oil and add 1/2 cup of crushed pineapple (well-drained) to the batter. Use macadamia nuts instead of pecans, and add a teaspoon of coconut extract to the glaze. It sounds weird, but trust me—it's like Hawaii and Texas had a beautiful, delicious baby. The pineapple adds moisture and a subtle tang that cuts through the richness, while the coconut oil gives it this incredible aroma that'll transport you straight to the beach.
The Chocolate Twist
Add 1/4 cup of cocoa powder to the dry ingredients and replace the nuts with chocolate chips. Use dark brown sugar instead of granulated for a deeper flavor. The result is this incredible chocolate-cinnamon hybrid that tastes like Mexican hot chocolate in cake form. Kids go absolutely bananas for it, and adults appreciate the sophisticated flavor profile. It's like Texas Tornado Cake went to finishing school and came back with refined tastes but the same wild heart.
The Breakfast Version
Add 1 teaspoon of espresso powder to the dry ingredients and serve this cake for breakfast with strong coffee. The coffee enhances the chocolate notes from the cinnamon and makes it taste more sophisticated than breakfast has any right to be. It's still basically cake, but calling it a "coffee cake" makes it socially acceptable to eat before noon. I've served this at brunches and watched people who claim they "don't eat sweets for breakfast" go back for thirds.
The Spicy Texan
Add 1/4 teaspoon of cayenne pepper and 1/2 teaspoon of chipotle powder to the dry ingredients. The heat is subtle—more of a gentle warmth that builds after you swallow rather than an upfront punch. It pairs incredibly well with the sweetness of the glaze and makes people pause mid-bite, trying to figure out why they suddenly can't stop eating. Serve this version to people who think they know what Texas Tornado Cake tastes like and watch their minds get blown.
The Gluten-Free Conversion
Replace the all-purpose flour with a 1:1 gluten-free baking blend (I like King Arthur's), but add an extra egg for structure. The result is surprisingly identical to the original—so much so that I've served it to gluten-eating friends who had no idea. The buttermilk and oil help keep it moist, which is usually the biggest challenge with gluten-free baking. Just make sure your baking blend contains xanthan gum, or add 1/2 teaspoon if it doesn't.
Storing and Bringing It Back to Life
Fridge Storage
Despite what I said earlier about room temperature storage, sometimes refrigeration is unavoidable—like if you're in Florida in August and your AC is having an identity crisis. If you must refrigerate, wrap the cake tightly in plastic wrap, then foil, to prevent it from absorbing weird fridge odors. It'll keep for up to a week but will need to come back to room temperature before serving. Give it at least two hours on the counter, or the texture will be all wrong—cold Texas Tornado Cake is a sad, sad thing.
Freezer Friendly
This cake freezes beautifully, which is dangerous information to have. Wrap individual pieces in plastic wrap, then foil, and freeze for up to three months. Thaw overnight in the refrigerator, then bring to room temperature before serving. The glaze might look a little cloudy after freezing, but it tastes exactly the same. Pro tip: freeze pieces before you eat the whole thing in one sitting, unless you're into that kind of self-destructive behavior.
Best Reheating Method
For the love of all that's holy, do not microwave this cake for more than 10 seconds. If you need to reheat a larger portion, wrap it in foil and warm it in a 300°F oven for about 10 minutes. The goal is to warm it through without drying it out or turning the glaze into a hard shell. Add a tiny splash of water before reheating—it steams back to perfection and keeps everything moist and delicious.