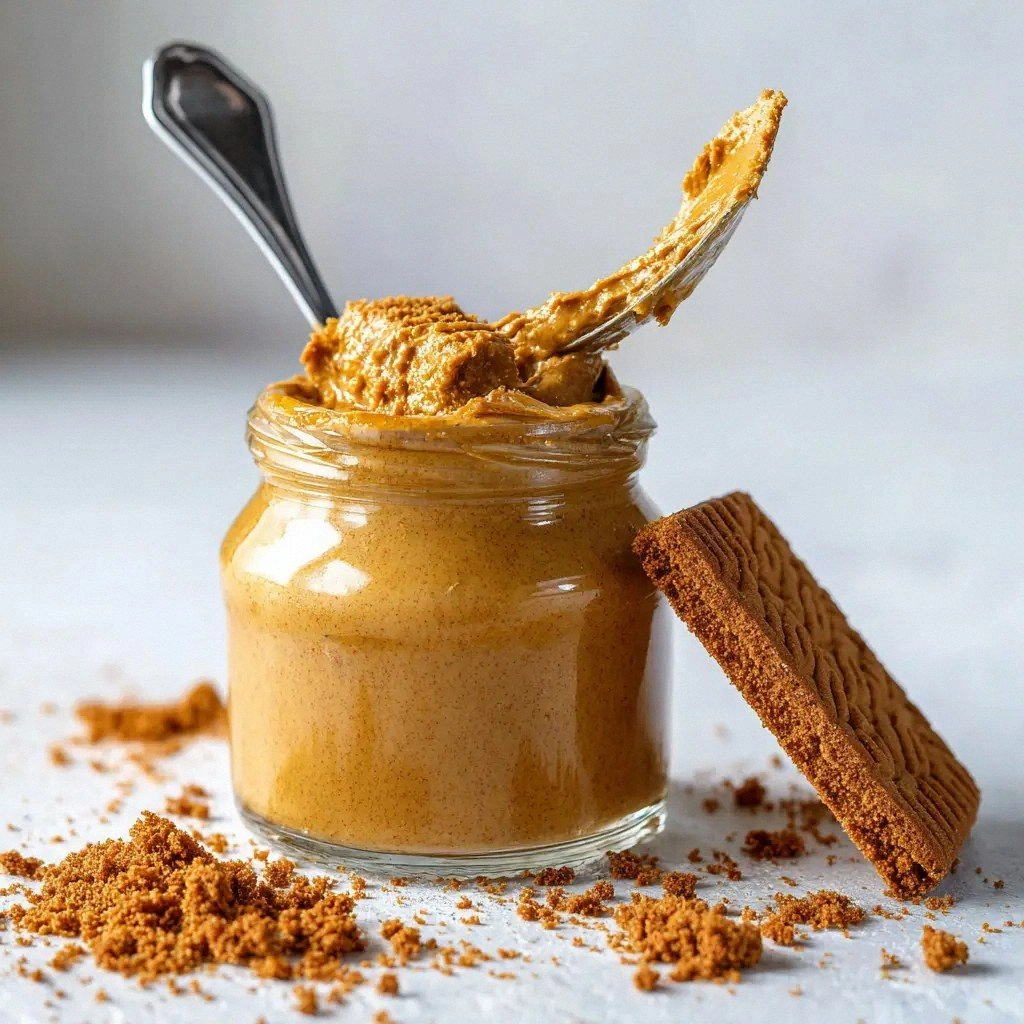
I was halfway through a chaotic Sunday brunch, juggling a pot of simmering gravy, a sheet of parchment paper, and a rogue banana that had decided to turn into a fruit fly. The kitchen was a mess, the air thick with the scent of burnt sugar and the faint, desperate whisper of a missing dessert. That is when the Biscoff jar on the counter—its glossy brown surface glinting like a secret—caught my eye. I dared myself to create something that would turn the chaos into a sweet, buttery masterpiece. And so, I set out to make what I swear is the ultimate homemade creamy Biscoff cookie butter, a spread that feels like a hug, a whisper, and a daring invitation all at once.
Picture this: the moment you open the jar, a sweet, caramelized aroma envelopes you, the buttery scent of coconut oil mingling with the deep, caramel notes of Biscoff. The texture is silky, yet it holds a gentle crunch from the cookie bits that cling to the sides of your spoon. When you spread it on toast, the butter melts into the warm bread, creating a molten, velvety surface that tastes like a caramelized hug. The flavor is a harmonious blend of sweet, salty, and a hint of warm cinnamon that lingers on the palate, leaving you craving more. I dare you to taste this and not go back for seconds.
What makes this version stand out? I’m talking about a recipe that’s hands down the best you’ll ever make at home. Most recipes get this completely wrong, either by overmixing and ending up with a dry, crumbly spread or by under-seasoning and missing the depth that Biscoff brings. Here, I’ve fine-tuned the balance of ingredients, added a splash of evaporated milk for a silky texture, and introduced a pinch of sea salt that elevates the caramel sweetness to a whole new level. The result is a spread that feels luxurious, yet is simple enough to whip up in under an hour. Picture yourself pulling this out of the fridge, the whole kitchen smelling incredible, and knowing that every bite is a moment of pure bliss.
If you've ever struggled with making a smooth, flavorful cookie butter, you're not alone. I've been there, watching the mixture thicken into a clumpy mess and feeling the frustration build. But I’ve cracked the code, and I’m about to walk you through every single step. By the end, you’ll wonder how you ever made it any other way.
What Makes This Version Stand Out
- Flavor: The caramelized sweetness of Biscoff is amplified by a touch of sea salt, creating a depth that’s both familiar and unexpectedly complex.
- Texture: Evaporated milk and coconut oil blend to produce a silky, pourable consistency that still retains the delightful crunch of cookie crumbs.
- Ease: No special equipment required—just a food processor or high-powered blender will do.
- Versatility: Works as a spread, a frosting, or a dip for fruits and crackers.
- Crowd Appeal: The first bite is a revelation; friends will ask for the recipe after the first taste.
- Ingredient Quality: Using high‑quality Biscoff cookies ensures a richer flavor and better texture.
- Make‑Ahead: The spread can be stored for weeks, making it perfect for parties or quick breakfasts.
- Health Conscious: While indulgent, the recipe balances sweetness with natural flavors, reducing the need for excessive sugar.
Alright, let’s break down exactly what goes into this masterpiece…
Inside the Ingredient List
The Flavor Base
Biscoff cookies are the star of the show, providing the signature caramelized, spiced flavor that makes this spread unforgettable. They’re already a sweet, buttery cookie, so they bring a natural richness that you can’t achieve with vanilla or chocolate. If you skip them, you’ll lose the depth that makes the spread so irresistible. For a lighter version, you can use half the amount of cookies and add a splash of maple syrup to compensate for sweetness.
The Texture Crew
Evaporated milk and coconut oil work together like a dynamic duo. Evaporated milk adds body and a slight tang, preventing the spread from becoming too thick. Coconut oil, on the other hand, keeps the mixture silky and helps it stay firm at room temperature. If you prefer a dairy-free alternative, swap evaporated milk for oat milk, and keep the coconut oil unchanged for that same luxurious mouthfeel.
The Unexpected Star
Ground cinnamon and sea salt are the quiet heroes that elevate the flavor profile. Cinnamon brings warmth and a subtle spice that balances the sweetness, while sea salt cuts through the richness, making each bite feel more complex. If you’re a cinnamon skeptic, try adding a pinch of nutmeg for a different spice note. Just remember, salt is the secret that turns a good spread into a great one.
The Final Flourish
Light brown sugar and vanilla extract are the finishing touches that bring everything together. The sugar adds a caramel undertone that harmonizes with the Biscoff, while vanilla offers a fragrant depth that lingers on the tongue. Skipping either will leave the spread feeling flat. If you’re watching sugar intake, use a natural sweetener like honey or maple syrup, but adjust the quantity to taste.
Everything's prepped? Good. Let's get into the real action…
The Method — Step by Step
- Break and Roughly Grind the Cookies: Start by placing the Biscoff cookies in a food processor. Pulse a few times until they’re broken into crumbs but not pulverized. Think of it like making coarse breadcrumbs; you want texture, not a fine powder. This step is crucial because it ensures a pleasant crunch in the final spread. If you skip it, the spread will be too smooth and lose that nostalgic cookie bite.
- Add Coconut Oil: Pour the coconut oil into the processor with the cookie crumbs. Coconut oil melts at room temperature, so it’s already in liquid form if you’re warm. The oil is the binder that helps the crumbs coalesce into a creamy base. If you prefer a lighter version, reduce the oil by one tablespoon, but be prepared for a slightly looser consistency.
- Watch Out: As the mixture starts to thicken, it can become hot. If you notice a sudden rise in temperature, pause the processor and give it a minute to cool down. This prevents the mixture from becoming too oily or separating. If you’re in a hurry, use a hand mixer instead; just keep the speed low to avoid splattering.
- Blend in Evaporated Milk: Add the evaporated milk to the processor. This liquid component is what gives the spread its silky, pourable texture. Pour it in a steady stream, allowing the processor to incorporate it fully before adding the next ingredient. The milk also adds a slight tang that balances the sweetness. If you’re using oat milk, add a tablespoon of lemon juice to mimic the acidity of evaporated milk.
- Sweeten the Mix: Toss in the light brown sugar. The sugar melts into the mixture, creating a caramelized base that enhances the Biscoff’s flavor. If you prefer a lower glycemic index, use coconut sugar or a natural sweetener like stevia; just adjust the quantity to taste. The sugar also helps the spread set slightly when chilled.
- Season and Flavor: Add the ground cinnamon, vanilla extract, and sea salt. These three ingredients are the secret sauce that transforms a simple cookie butter into a gourmet spread. The cinnamon adds warmth, the vanilla deepens the aroma, and the salt sharpens every bite. Mix for about 30 seconds, just enough to distribute the spices evenly without overprocessing.
- Final Blend: Run the processor for an additional 45 seconds to ensure everything is silky smooth. The mixture should have a glossy sheen, and a small spoonful should pour easily. If you find it too thick, add a teaspoon of milk and blend again. This final step is the moment of truth; the spread should feel like a velvety butter that coats your tongue.
- Transfer and Chill: Spoon the mixture into a clean jar or airtight container. Seal it tightly and refrigerate for at least an hour. This chilling period allows the flavors to meld and the spread to firm up to a perfect consistency for spreading. If you’re short on time, you can use it immediately, but it will be looser.
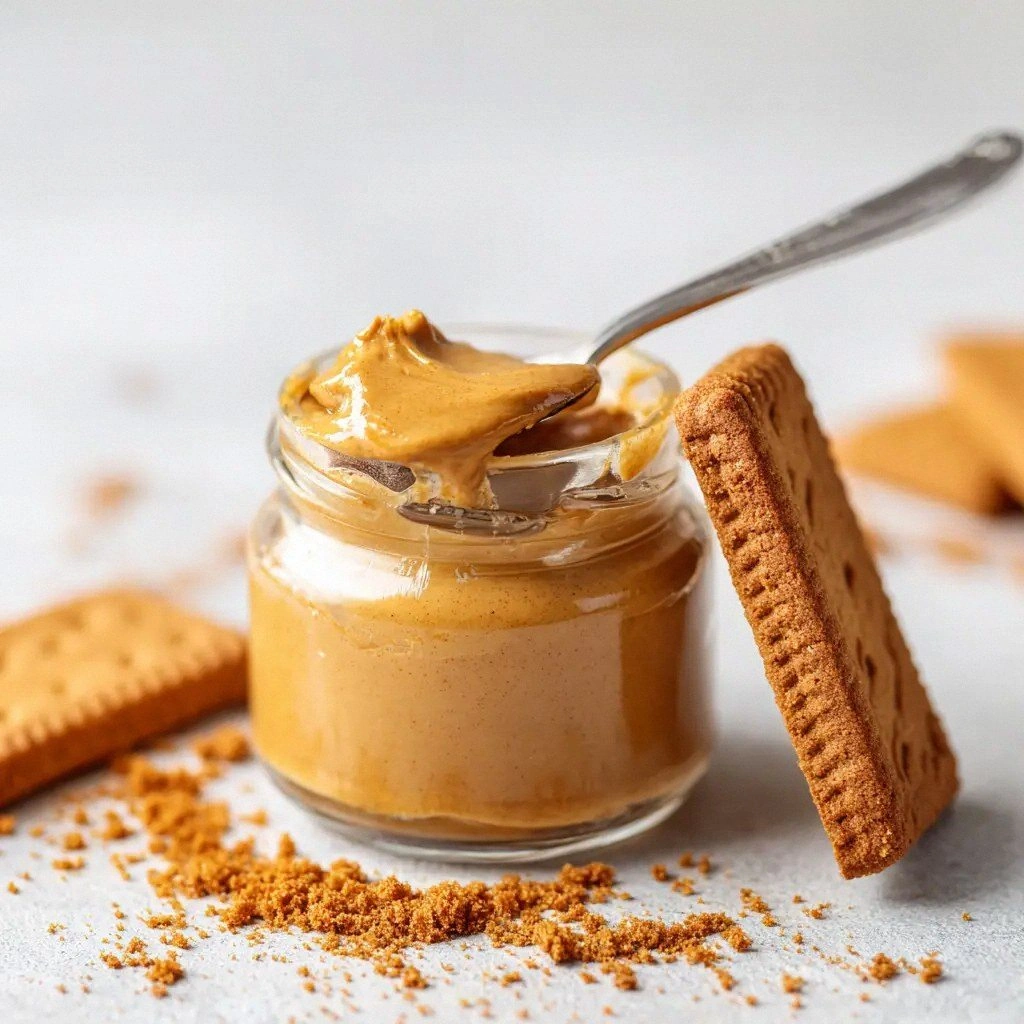
- Serve and Enjoy: Once chilled, give the jar a quick stir, and it’s ready to spread on toast, drizzle over pancakes, or dip fruit slices. The first bite will have that buttery, caramelized sweetness, followed by the gentle crunch of cookie crumbs. This is pure magic.
That's it — you did it. But hold on, I've got a few more tricks that'll take this to another level. If you want that ultra‑smooth finish, let the spread rest in the fridge for 24 hours; the flavors will deepen, and the texture will become even silkier.
Insider Tricks for Flawless Results
The Temperature Rule Nobody Follows
The key to a silky spread is temperature control. If the mixture is too hot, the coconut oil can separate, leaving a greasy texture. Keep your processor on low speed and pause every 30 seconds to let the mixture cool. If you’re using a blender, let it sit on the countertop for a minute between blends to prevent overheating.
Why Your Nose Knows Best
Before you even taste the spread, give it a sniff. A strong caramel aroma indicates that the Biscoff has released its full flavor. If the scent feels flat, give it a short extra blend; the heat from the processor will help release more flavor compounds.
The 5-Minute Rest That Changes Everything
After blending, let the mixture sit for five minutes. This pause allows the coconut oil to fully incorporate with the other ingredients, giving the spread a smoother consistency. Think of it as letting the flavors marinate together before you serve.
Keep It Fresh with Airtight Storage
Use an airtight jar to keep the spread from absorbing odors in the fridge. If you notice a slight change in color, it’s still safe; the natural oils will give it a richer hue over time. If you plan to store it for more than a week, keep it in the freezer and thaw it at room temperature.
Reheat with a Splash of Water
When you’re ready to serve a warm version, place the jar in a bowl of hot water for a minute. This gentle heat will soften the spread without melting the coconut oil, preserving the silky texture. A quick splash of water before reheating will also help it steam back to perfection.
Creative Twists and Variations
This recipe is a playground. Here are some of my favorite ways to switch things up:
Chocolate Biscoff Delight
Add two tablespoons of cocoa powder to the blend for a mocha‑infused spread. The chocolate pairs beautifully with the caramel notes, creating a dessert spread that’s perfect for chocolate lovers.
Nutty Crunch Version
Stir in a handful of chopped almonds or hazelnuts before chilling. The nuts add a crunchy texture and a nutty flavor that complements the Biscoff’s sweetness.
Spiced Cinnamon Swirl
Replace the vanilla with a teaspoon of pumpkin spice blend and increase the cinnamon to one teaspoon. This variation is perfect for fall and brings a comforting, seasonal warmth.
Low‑Sugar Option
Swap the light brown sugar for a natural sweetener like stevia or monk fruit. Keep the quantity the same but adjust to taste; you’ll still get a creamy, sweet spread with fewer calories.
Herb‑Infused Surprise
Add a pinch of fresh rosemary or thyme for an unexpected herbal note. The herb balances the sweetness, making the spread suitable for savory spreads on crackers or as a glaze for roasted meats.
Vegan Vanilla Twist
Use oat milk instead of evaporated milk and coconut oil instead of butter. This vegan version maintains the same silky texture while keeping it plant‑based.
Storing and Bringing It Back to Life
Fridge Storage
Store the spread in an airtight jar in the refrigerator for up to two weeks. The cold temperature helps the coconut oil firm up, giving the spread a perfect consistency for spreading. Keep the jar tightly sealed to prevent it from absorbing odors from other foods.
Freezer Friendly
For longer storage, freeze the spread in a freezer‑safe container for up to three months. When you’re ready to use it, let it thaw in the refrigerator overnight. The texture may separate slightly; give it a quick stir before serving.
Best Reheating Method
To warm the spread, place the jar in a bowl of hot water for a minute or two. This gentle heat will soften the spread without melting the coconut oil, preserving its silky texture. If you prefer a quick microwave reheat, use 10‑second intervals, stirring in between to ensure even warming.